Grouping
The "Grouping" menu item offers the following grouping options and 7 additional custom user fields:
1.) By project type: In the project properties (right-click -> Edit project), you can assign a project type to each project. This project type serves as a filter option in the project manager.
2.) By status: You can assign individual statuses to projects, e.g., Active, Paused, Stopped, and more.
3.) By priority: If you prioritize your projects, you can also group them by priority. You can then see at a glance which projects should be completed first.
4.) By progress: Haven't made much progress on a project yet? Group by progress if you need an overview of the progress of your projects.
5.) By time spent in %: This grouping shows you the percentage of time spent compared to your estimated hours.
6.) By start or end date: Do you still have many projects pending? Then you should group them by start or end date to see at a glance which project starts on which date.
7.) By person responsible: Each project should be assigned to a person responsible. This also gives the employee a contact person for the project. You can enter the person responsible in the project properties, in the "Employees" tab.
8.) By employee (Pro version): With this grouping, you can see at a glance which employee has been assigned to which project.
9.) By main work group: Each employee is assigned to a main work group. Group your projects according to the main work groups. This option is only visible when using work groups.
10.) By security level: Each project can be assigned a security level. This option is used to control visibility within the Xpert-Timer system. Each employee is also assigned a security level. An employee with a lower security level than the project will not see that project.
11.) By billing mode: You can see whether projects are billable, non-billable, or created for internal calculation by grouping them by billing mode.
12.) By escalation status: If you assign different escalation statuses, you can group your projects by status here. This gives you a direct overview of projects that are getting out of hand or where problems have arisen.
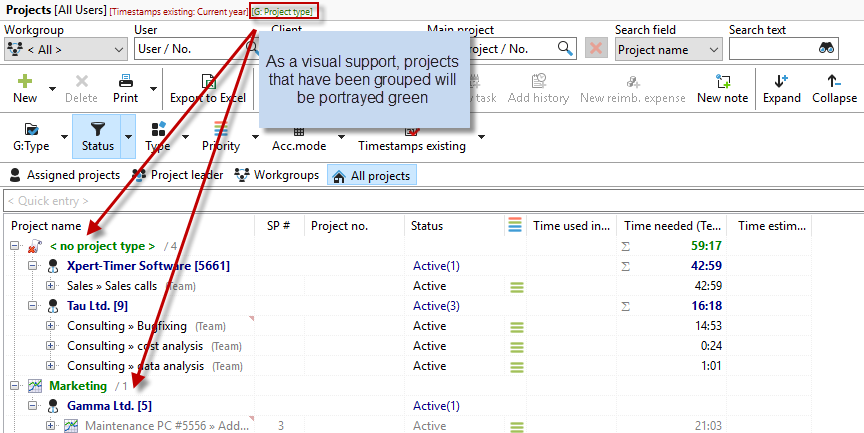
supp
When you select a grouping, your recorded times are displayed in "green." This is only for visual support so that it is immediately apparent that a grouping has been selected. In our example, we have grouped the project list by "project type."
Status
In Xpert-Timer, you can choose from eight project statuses and 10 free statuses that you can name yourself.

You can filter your project list according to the respective status:
1.) Active: All projects currently being worked on.
2.) Paused: A project is paused until a certain point in time.
3.) Cancelled: A project has been cancelled during its term. Please note: Time can still be booked for a cancelled project.
4.) Completed: A project completed in your company that has not yet been invoiced.
5.) Inactive: A planned project that has not yet been started.
6.) Billed: A completed and billed project that should be archived in the next step.
7.) Released: If your project is ready for billing, you can set the project to "Released."
8.) Archived: These projects should no longer be edited. For performance reasons, all recorded times are no longer included in SQL queries. Therefore, you will not see any recorded times for the projects.
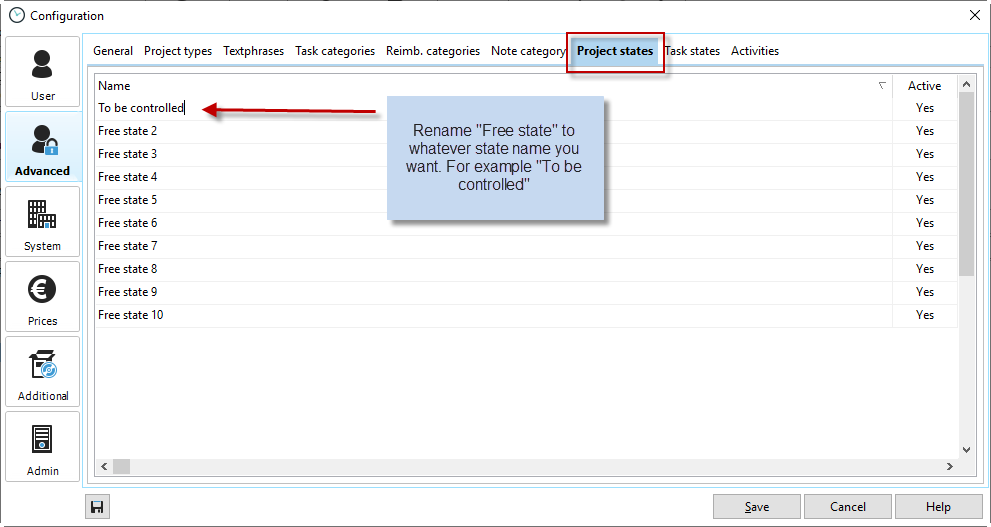
Set up free project statuses
You can assign the free project statuses in the configuration in the "Project status" tab. You can easily customize the status text by clicking on a line.
Project type
Project types serve as filters in your project list. Let's say you create a subproject called "Phone" or "Support" under each project. These two different project names can have the same project type. For example, the project type "Support" (you can name these project types freely). At the end of the month, you can now use the "Project type -> Assistance" filter to see exactly how much time you have spent on support and phone calls, even if these two projects are under different customers or main projects. Multiple project types can be selected.

Priorities
If you are working on projects with different priorities, you can also filter by these. If you only want to see the most important projects in your project manager, select the appropriate priority. Multiple selections are possible.

Views
All views you have set (filters & groupings) can be saved under View. Give your filter or grouping a meaningful name. Save the view in the View menu item. If you now click on this View button again, all saved templates will be available in the context menu.
